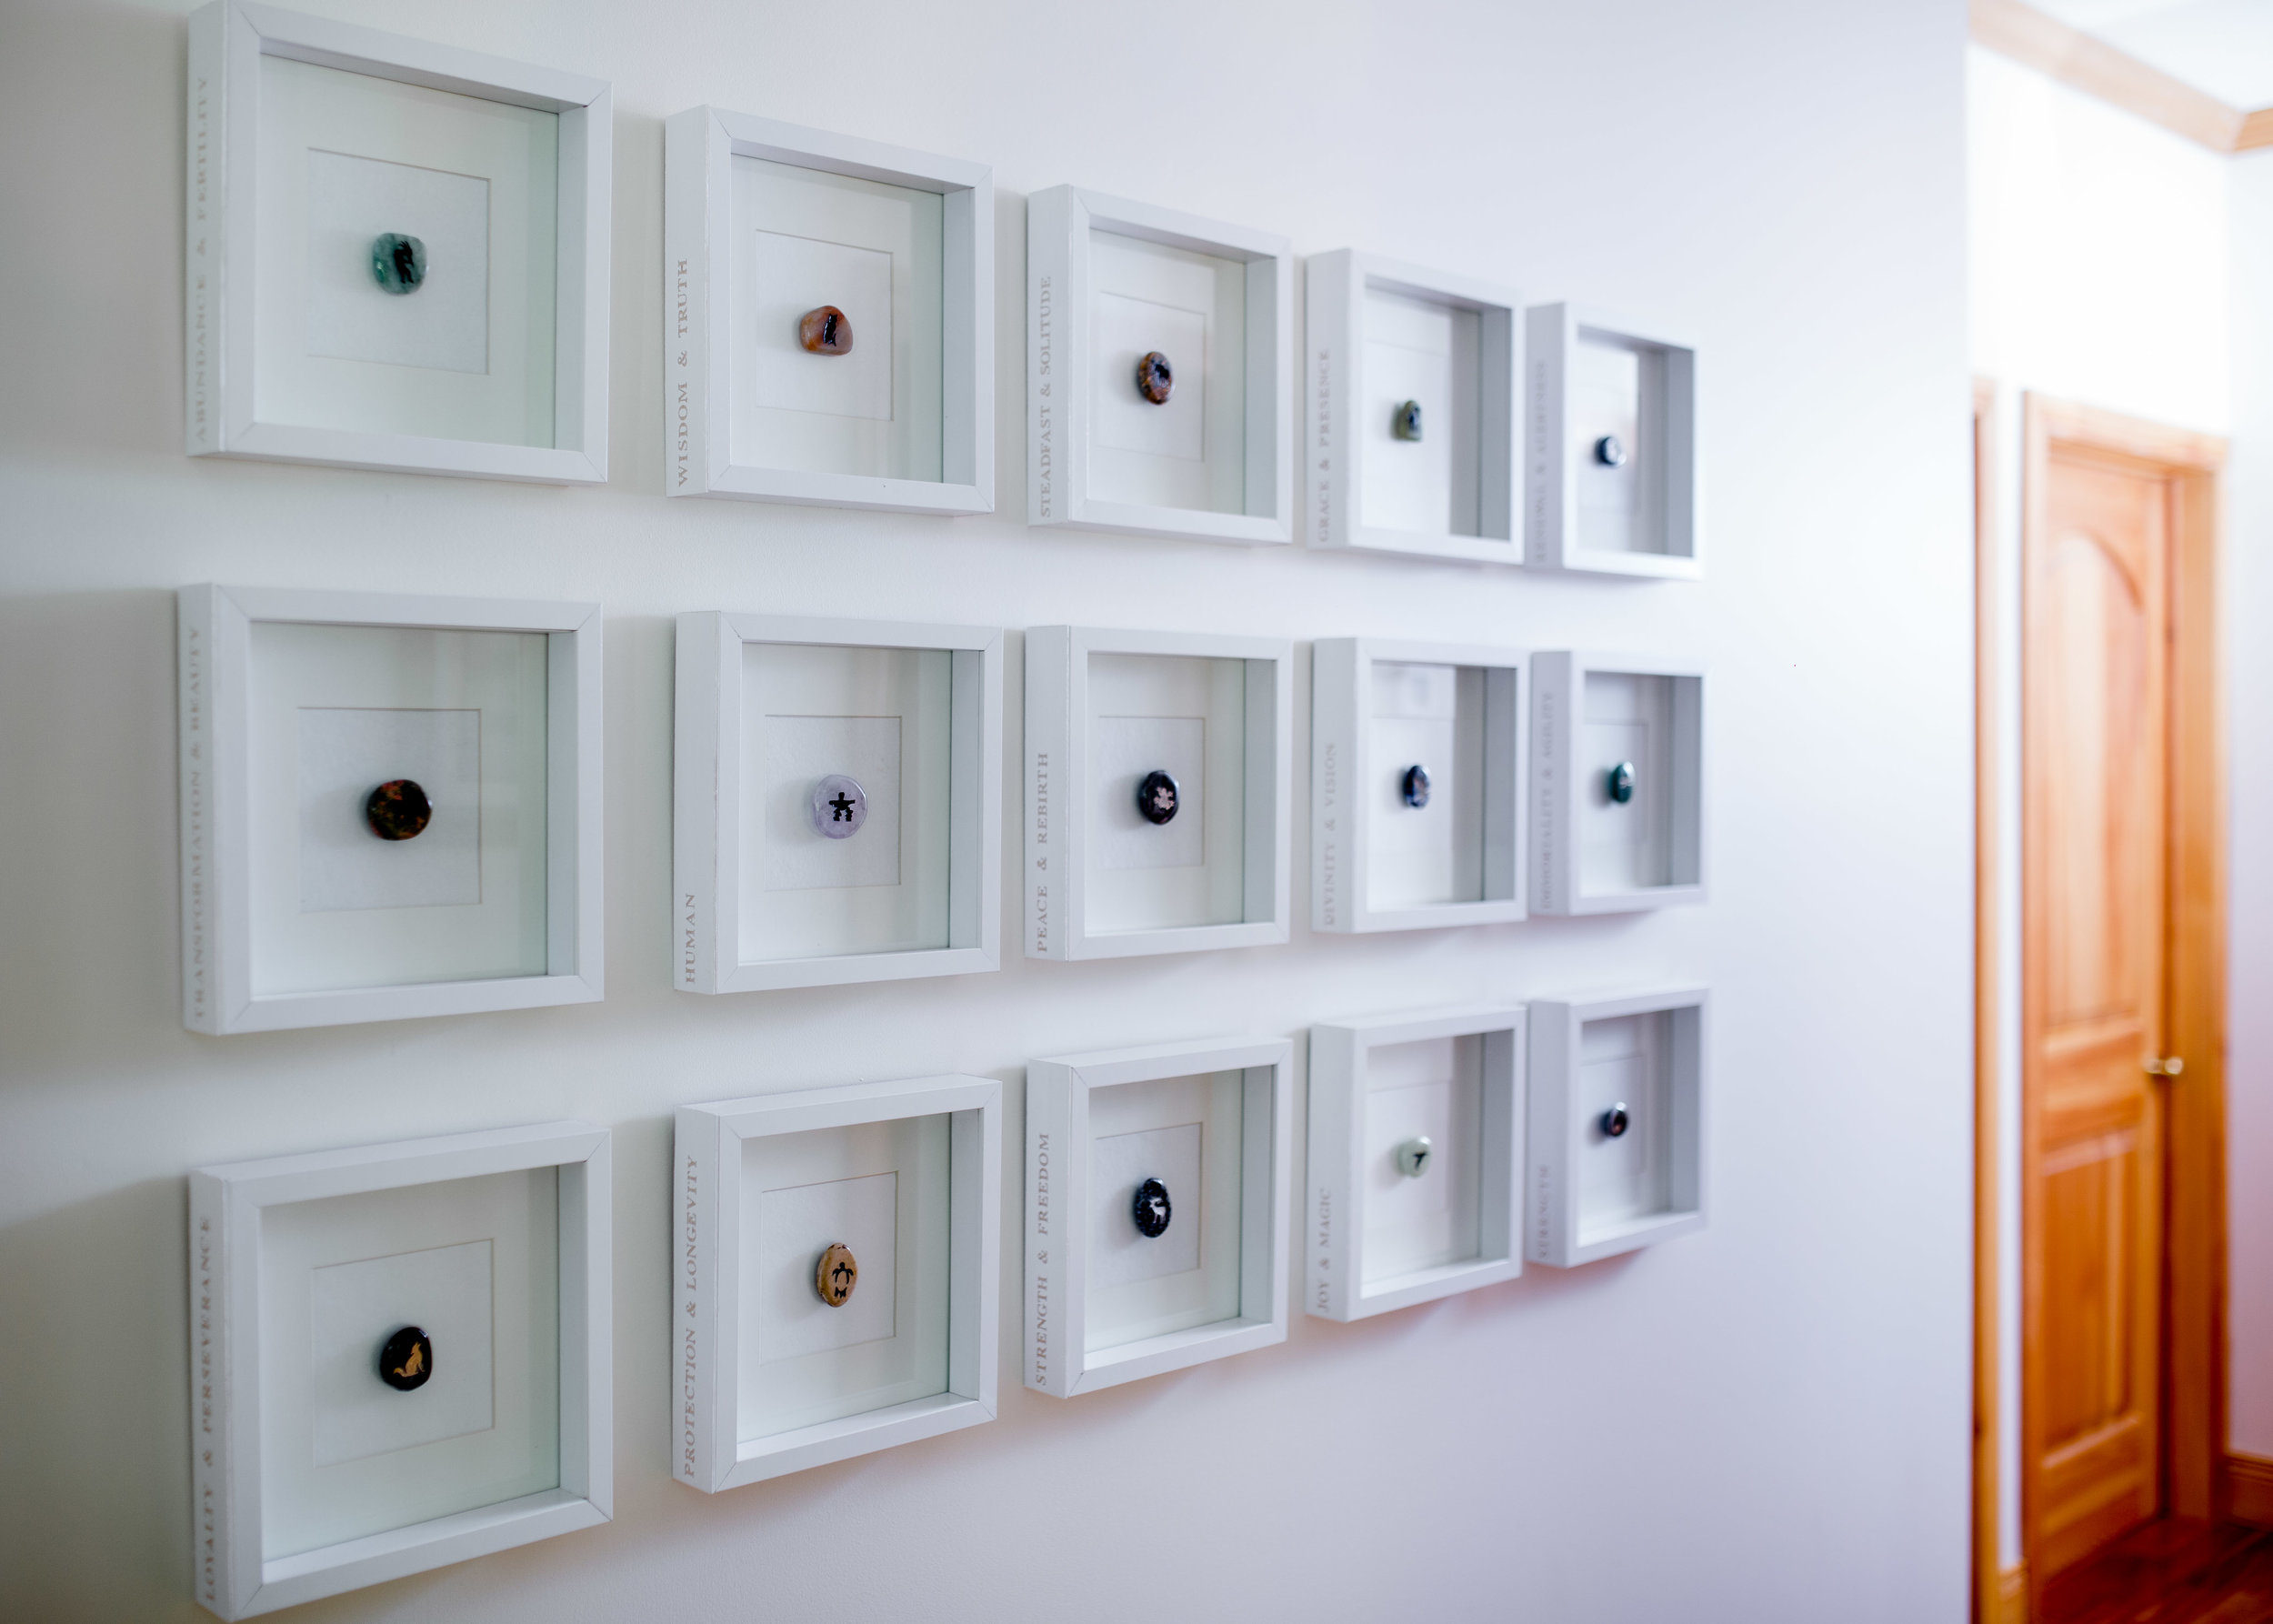
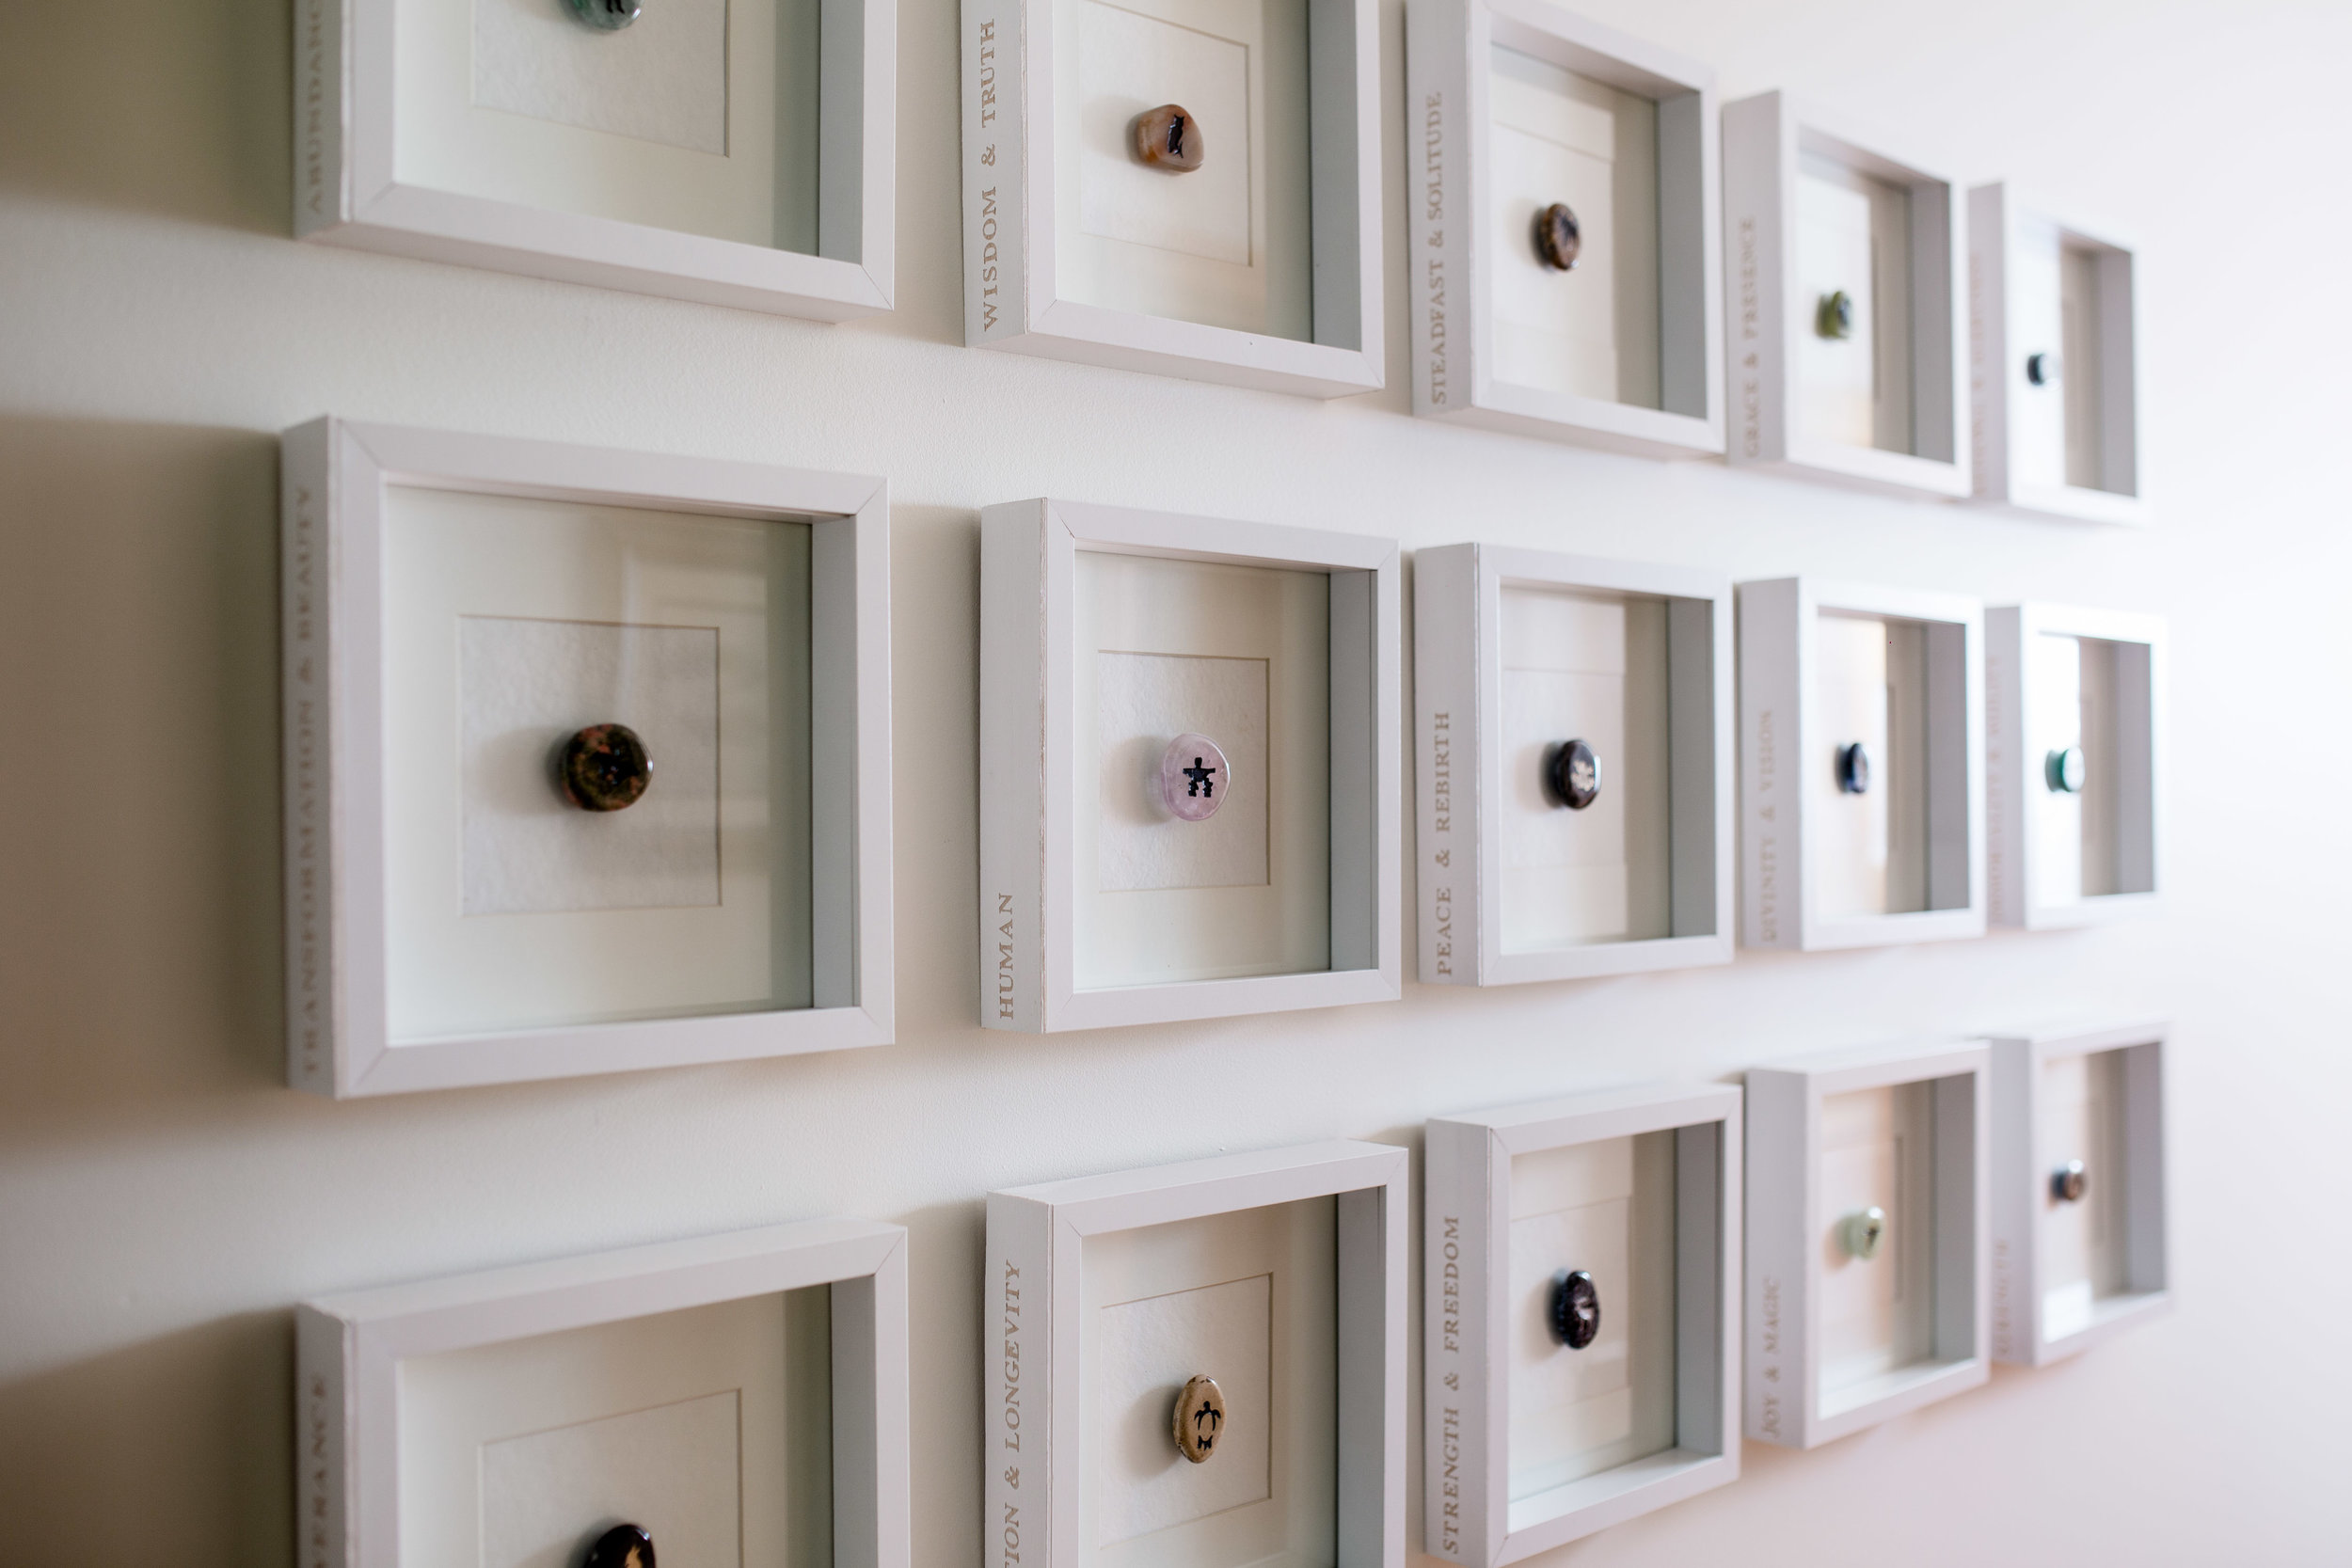
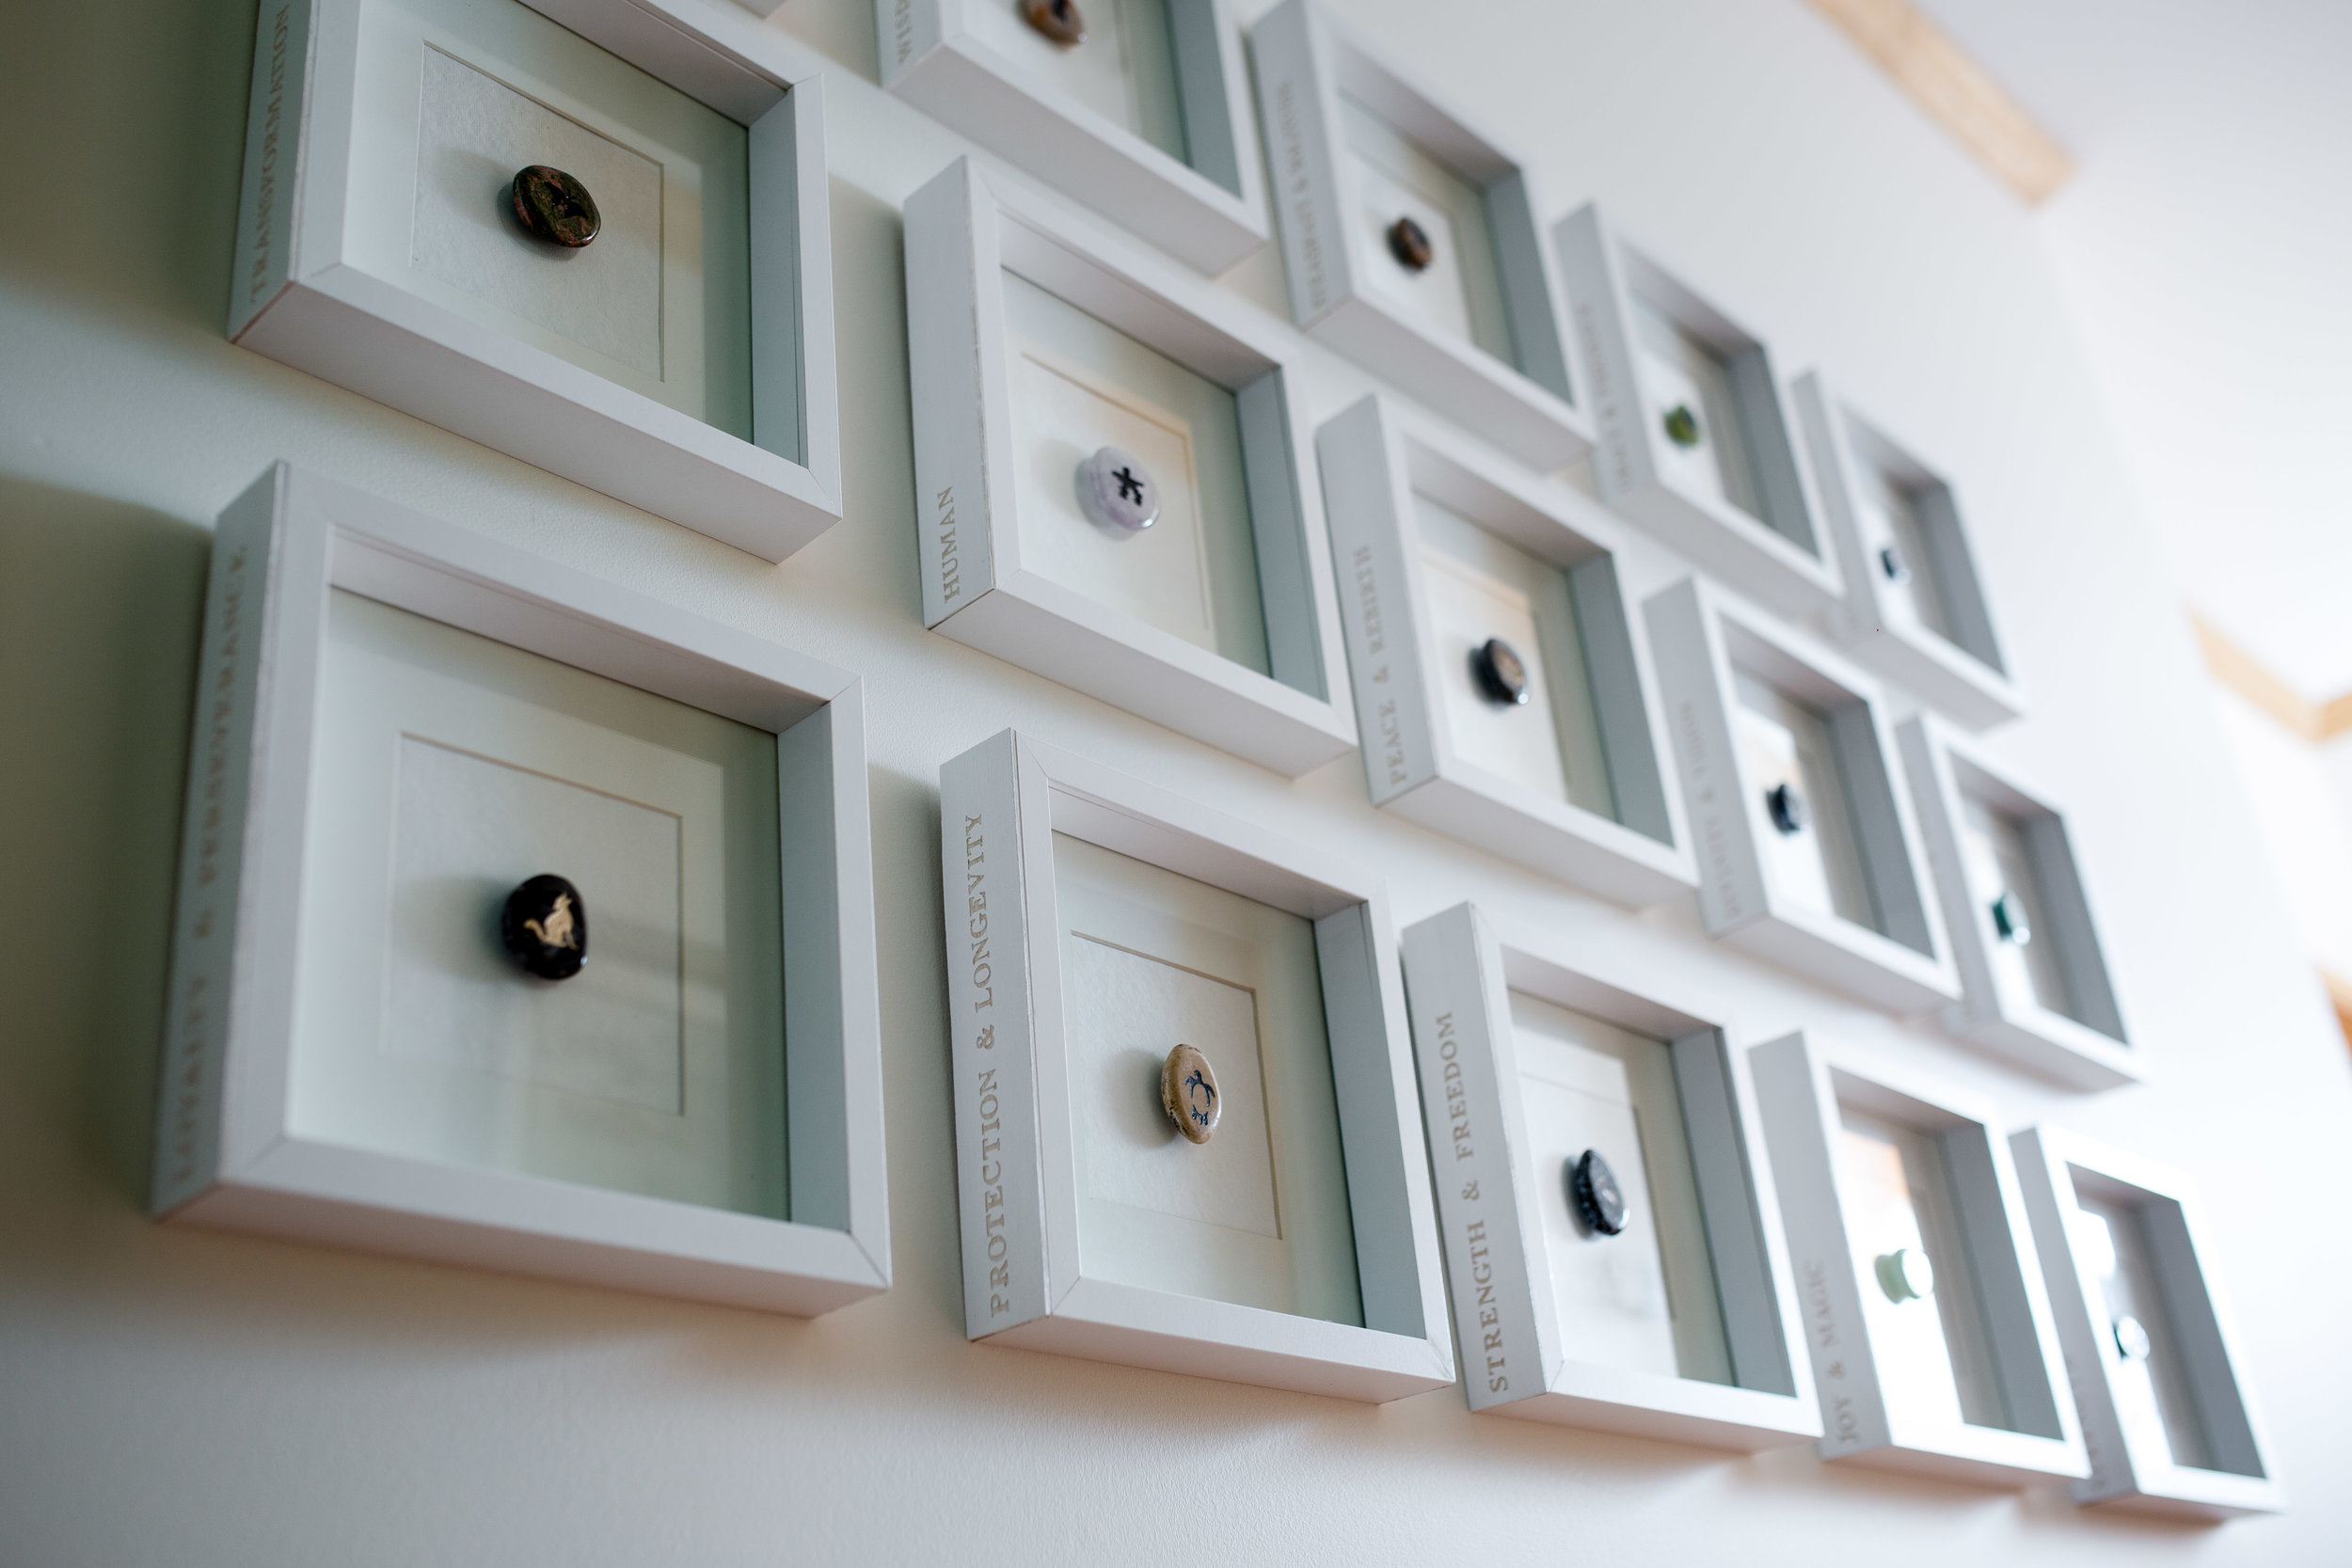
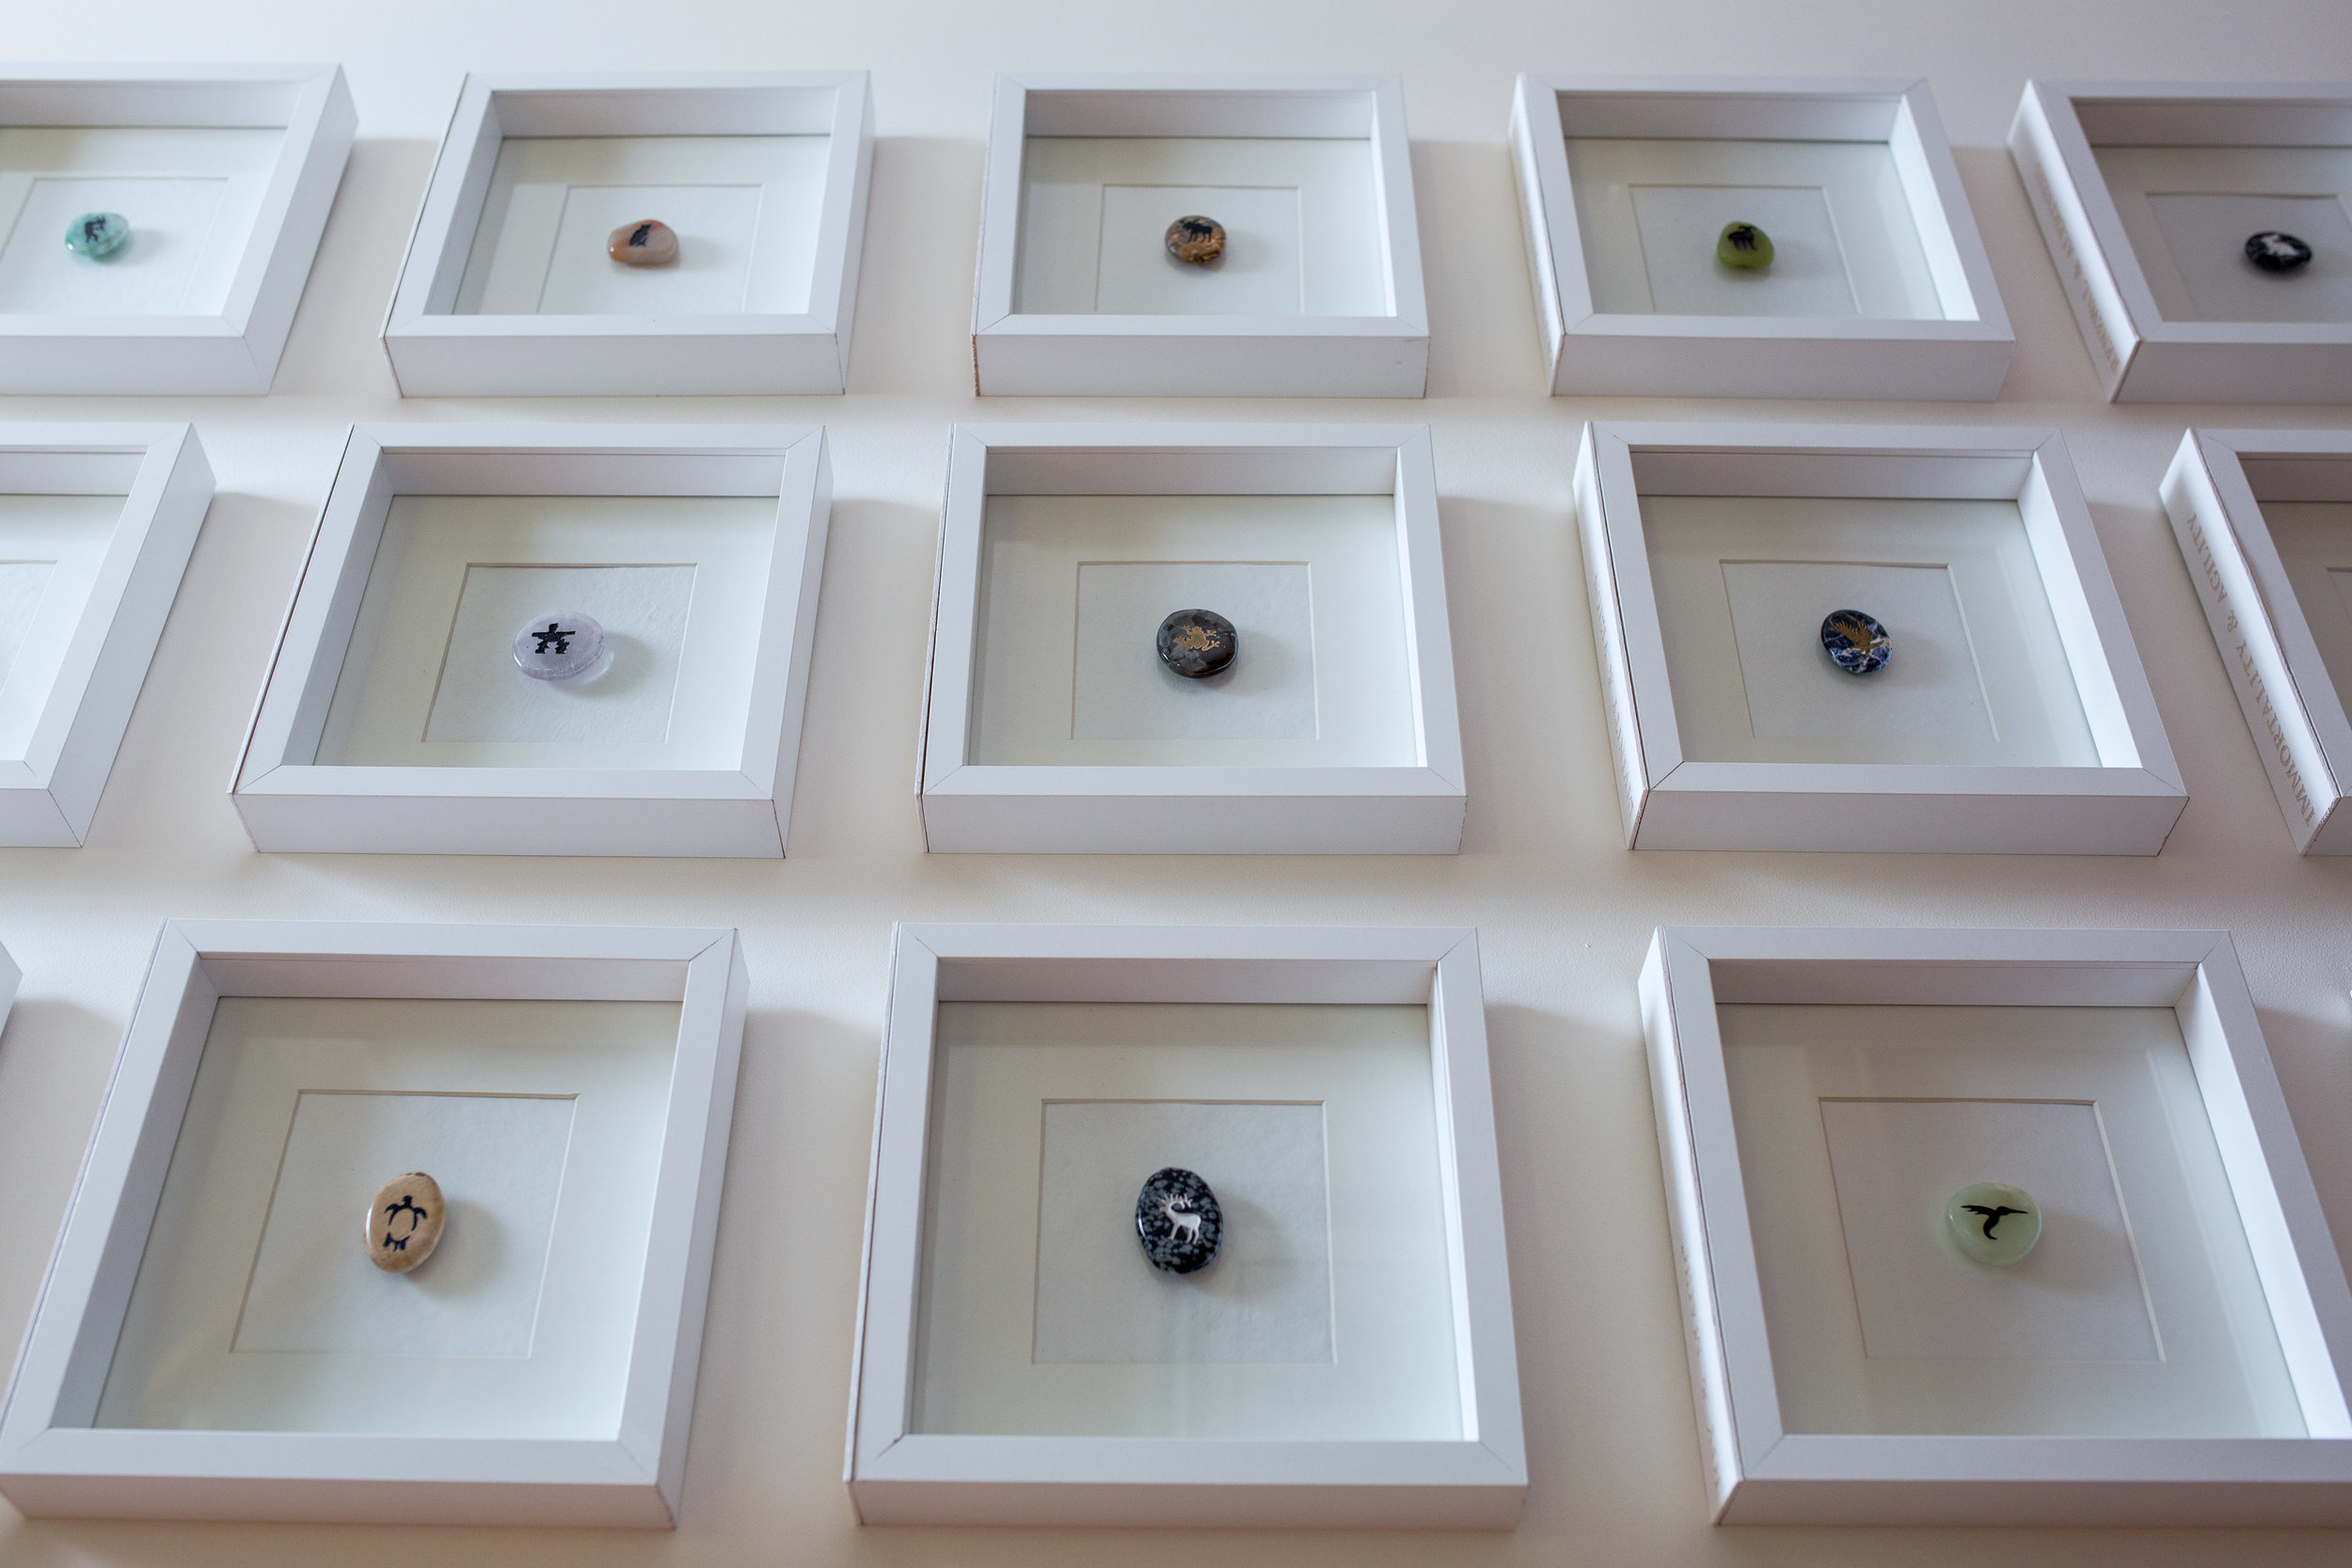
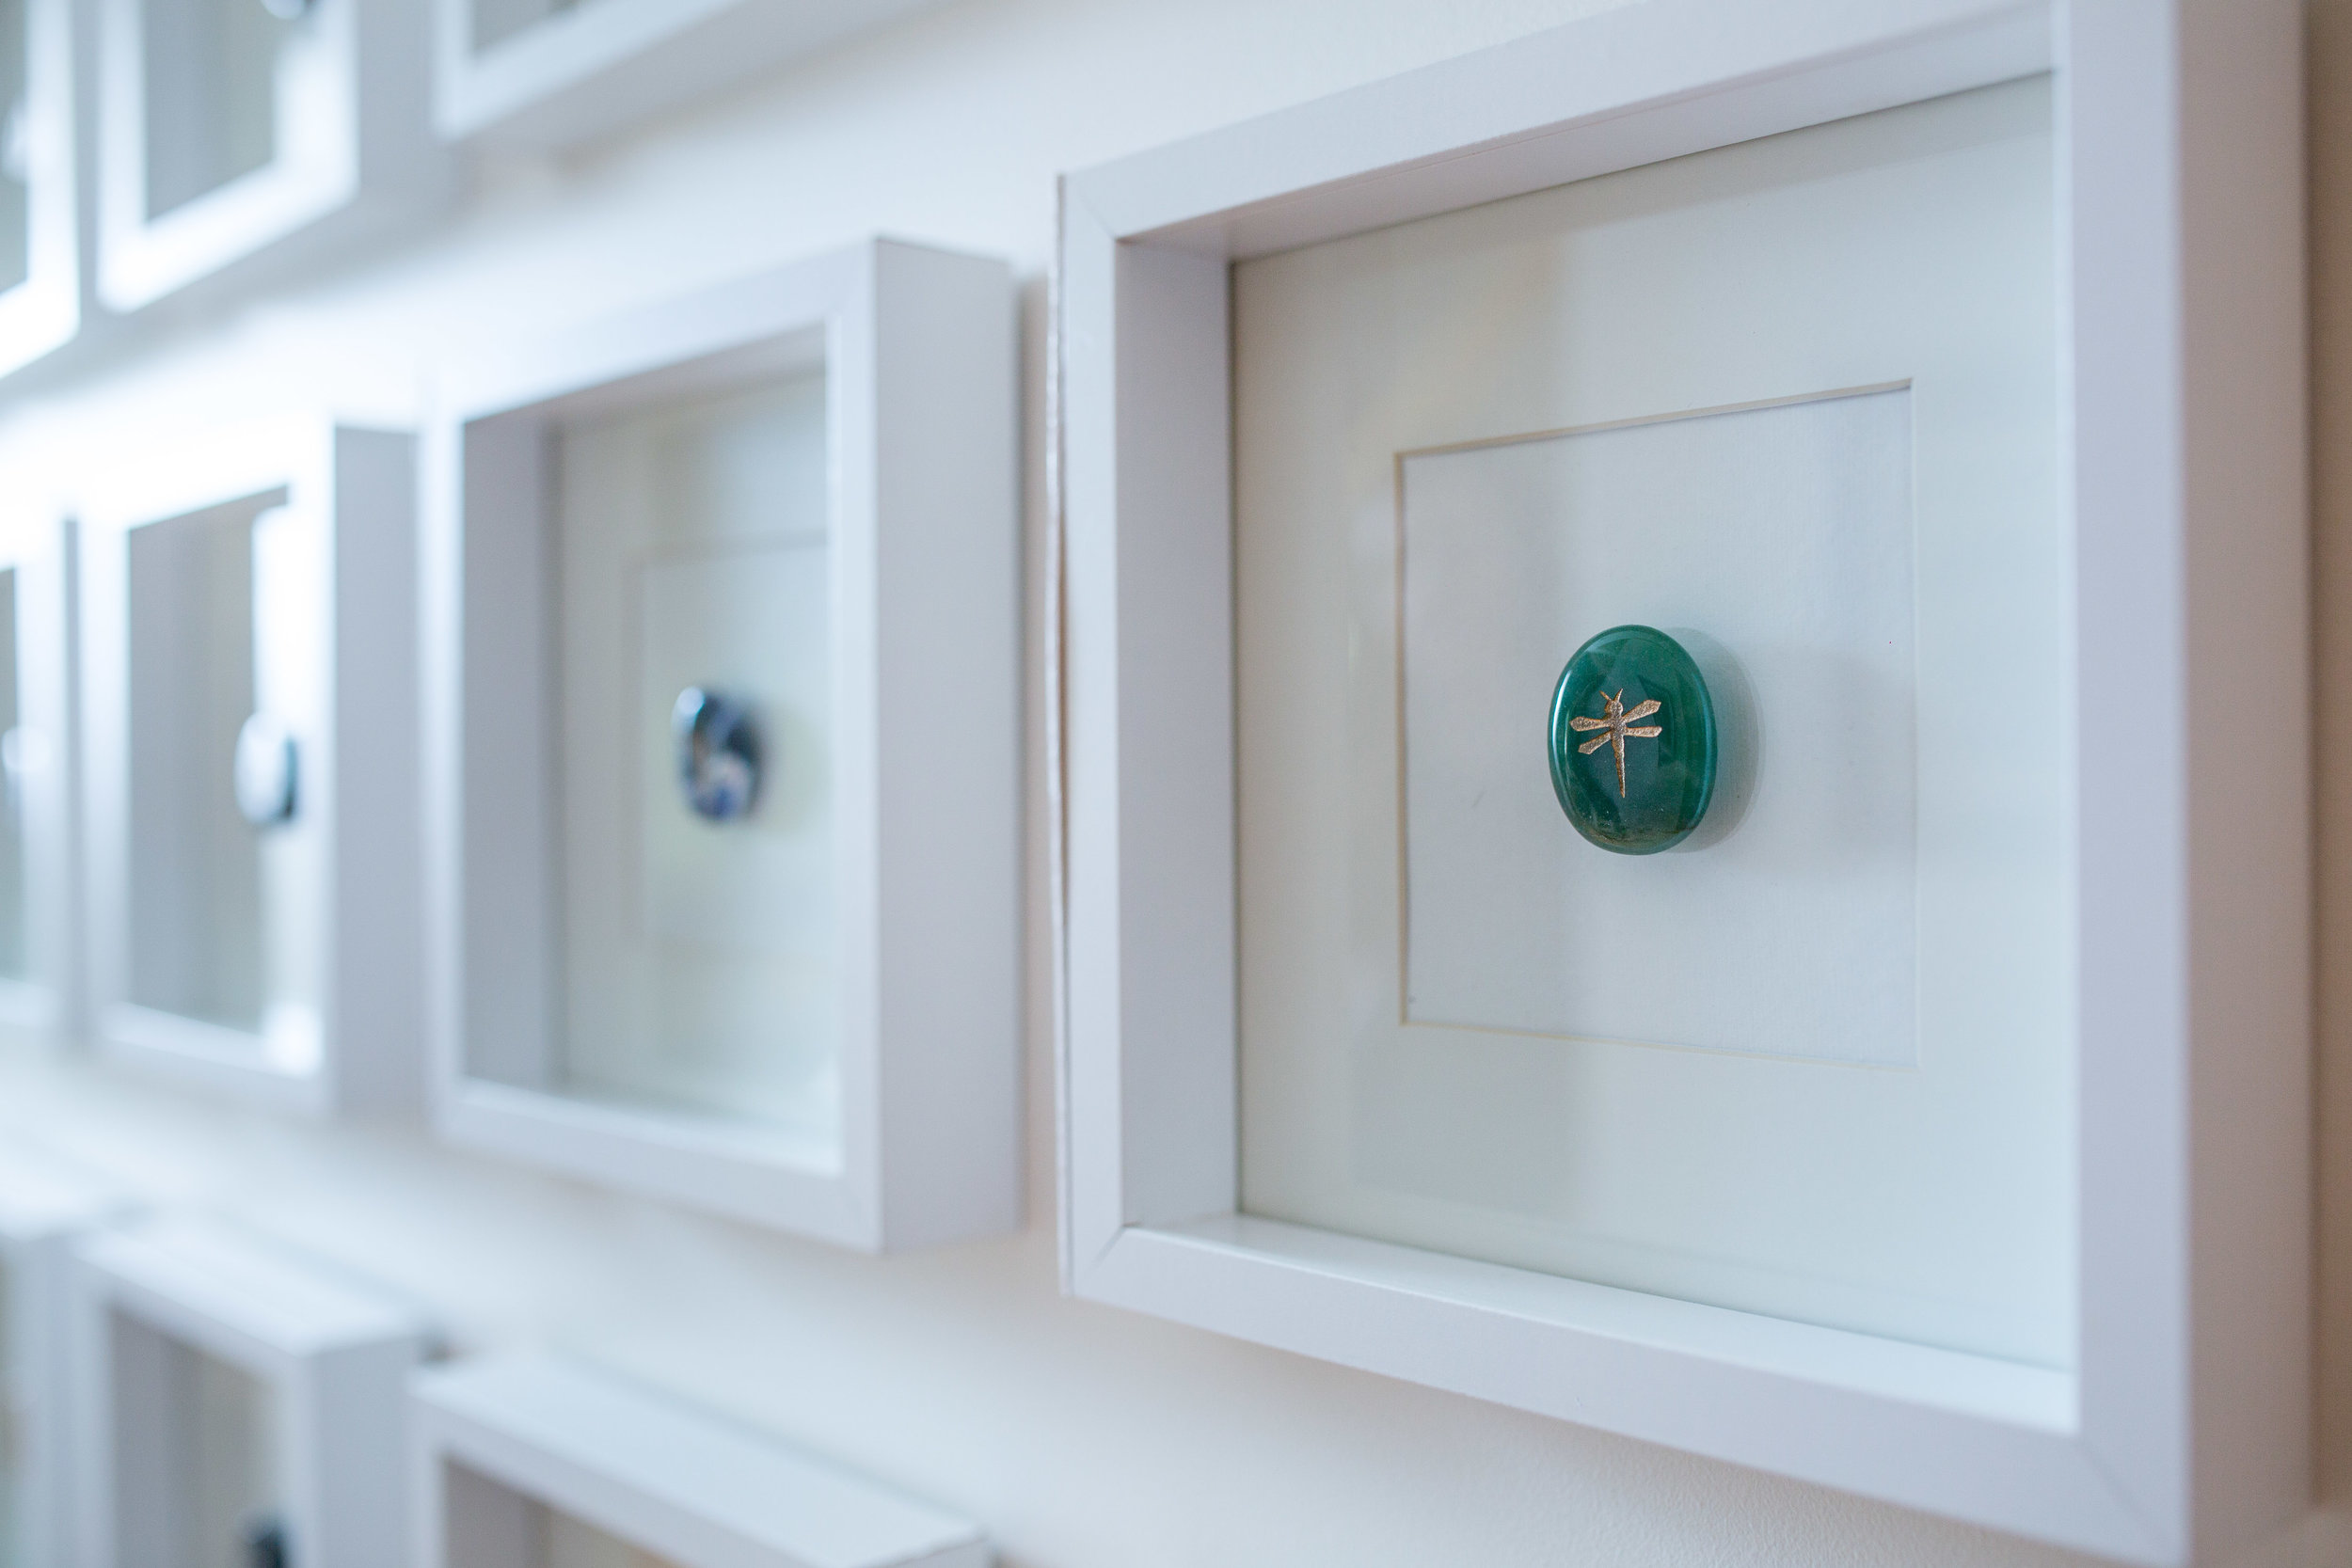
DIY | Totem Stone Art
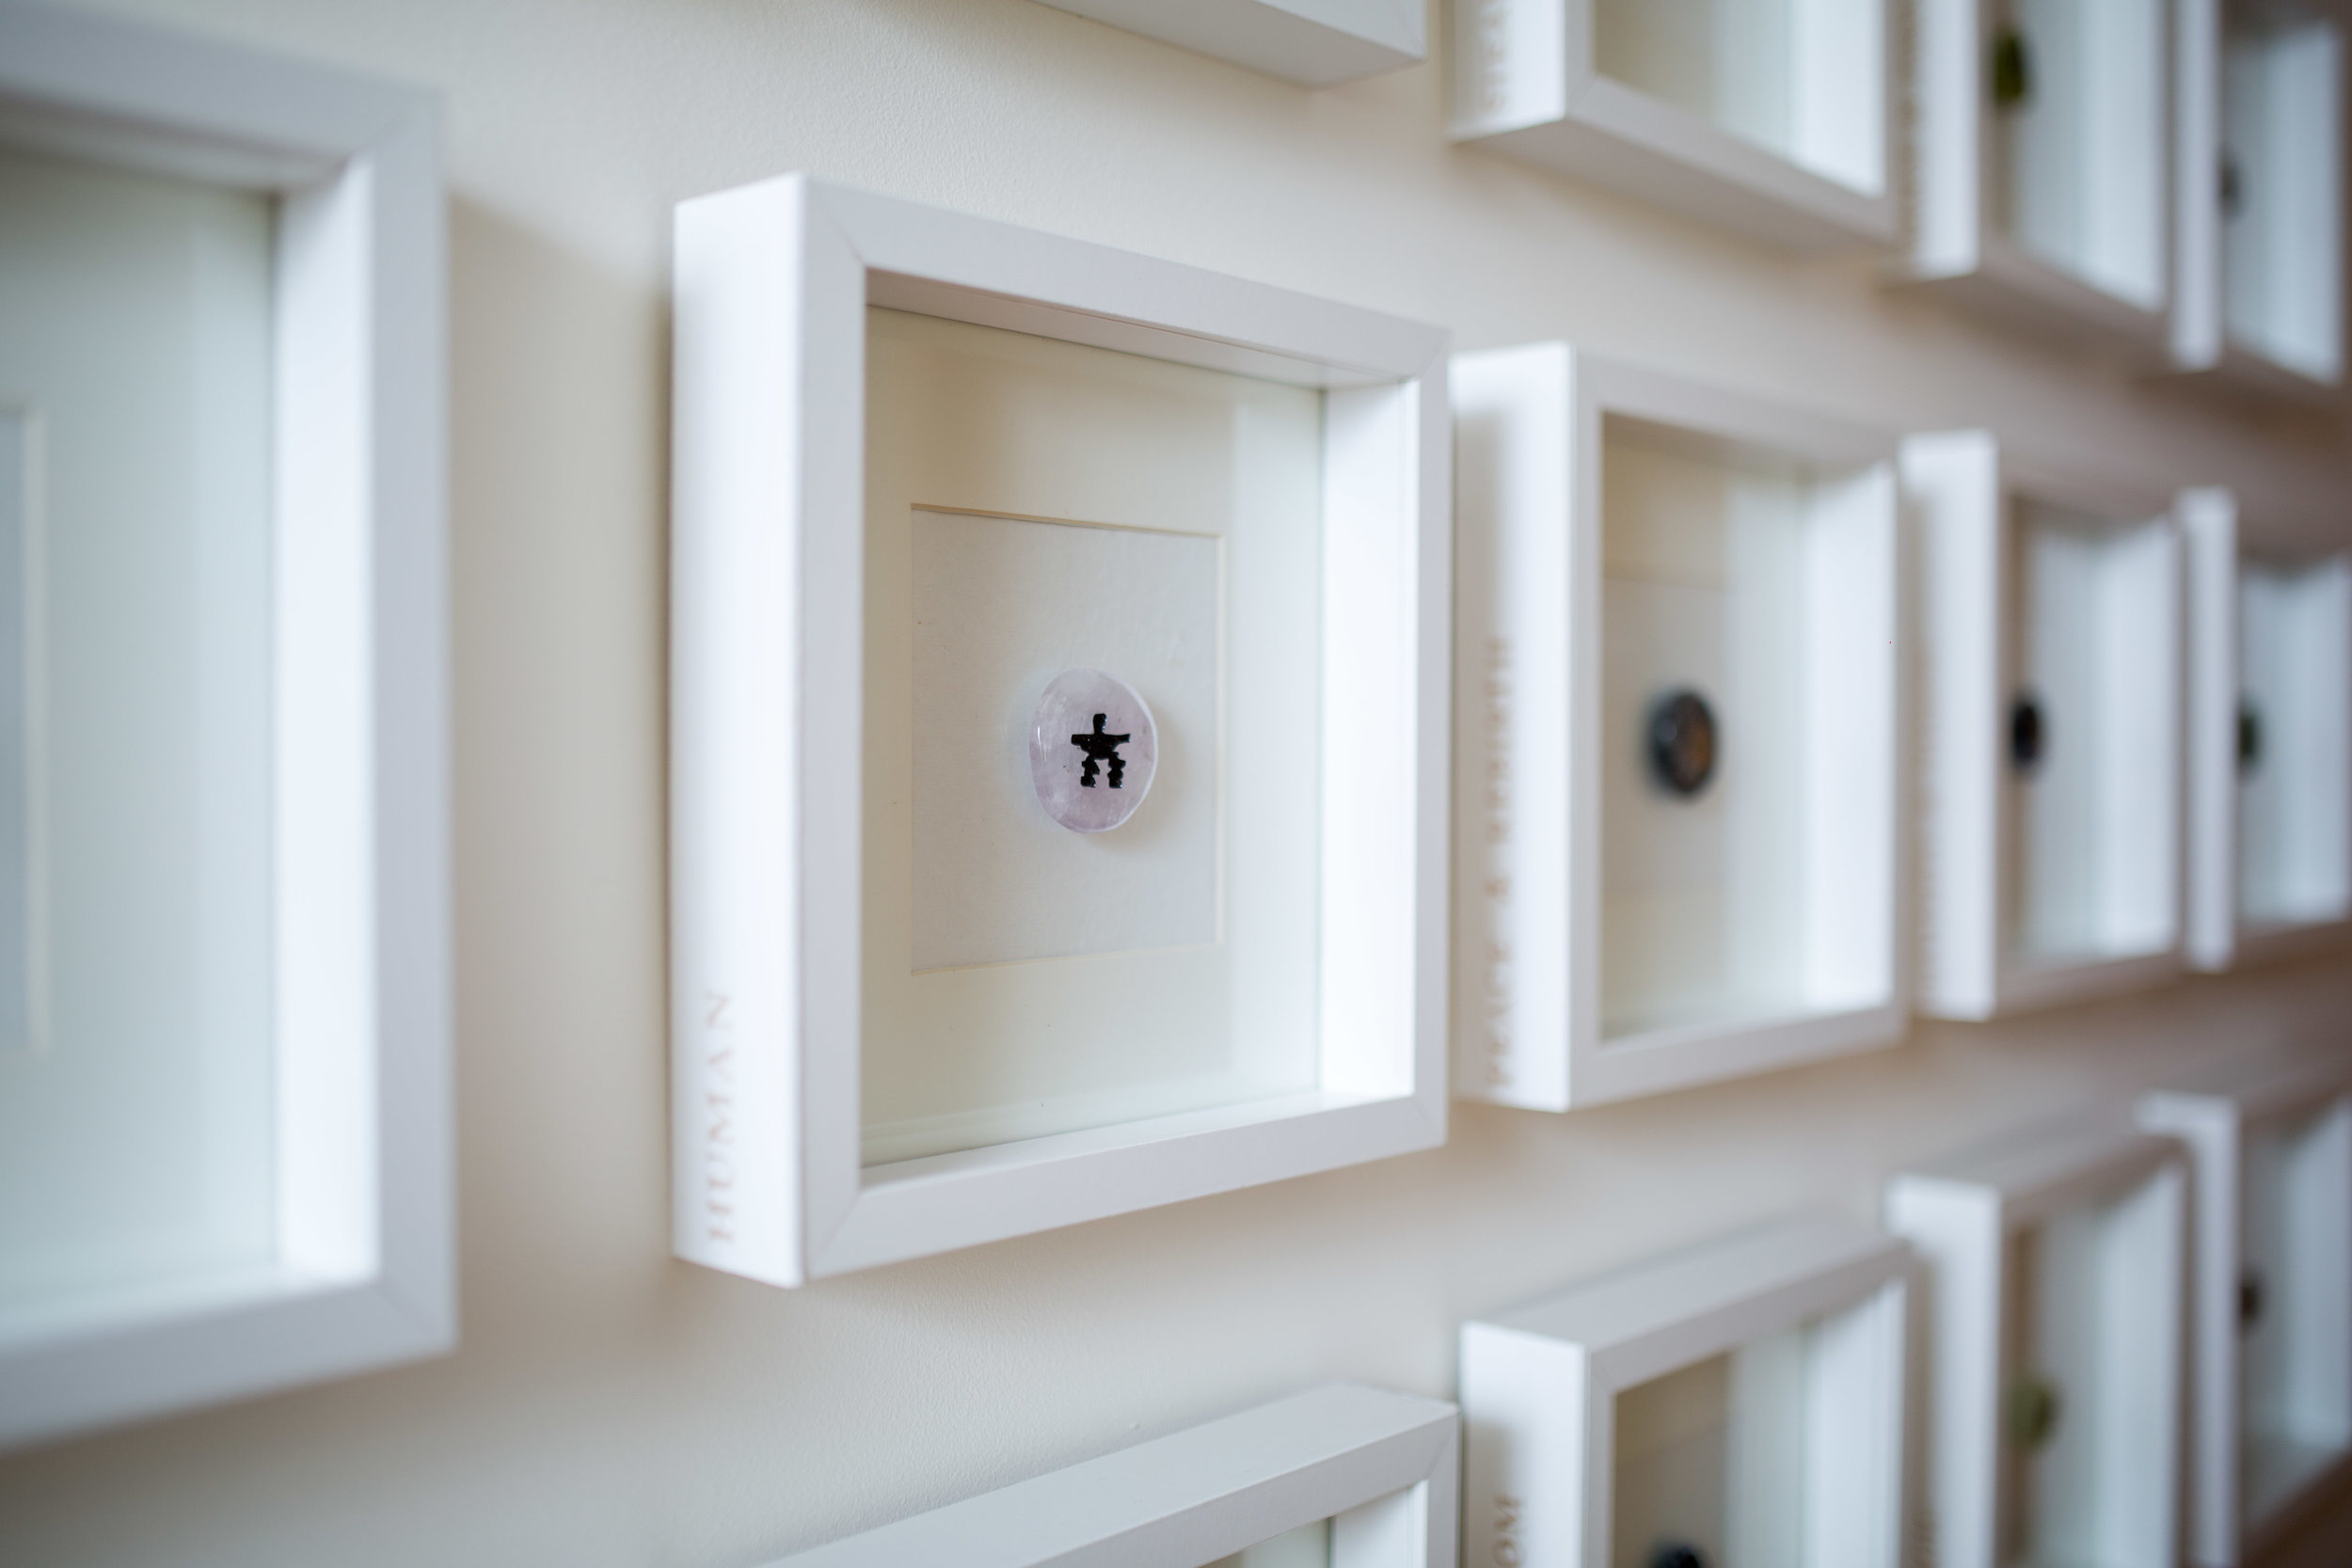
Each totem stone is different, with a symbol engraved into a polished precious stone. The symbols are a variety of animals and symbols, each with their own unique meaning. For example, a hummingbird means joy and magic. I stumbled upon these stones one summer when I was about ten, and thought they were incredibly interesting, so I began collecting them. Once I had a sizable collection, I was determined to find a way to display them in a simple yet elegant way, to ensure that the beauty of the stone was the focus. Because the display is so simple – both in aesthetics and execution – this method can easily be used for other items too.
Here’s what you’ll need:
Picture Frames
Stones
Hot Glue Gun & Glue Sticks
Tape
Balsa Wood
White Paint
Letter Stickers
Paint Brushes or Sponges
Exacto Knife
Cutting Matte
Here's what to do:
The first step is super simple. All you need to do is attach the stone to the front of the glass from the picture frame. To find the center, I used some tape to create an X on the back of the glass. Once you find the center, apply some hot glue to the back of the stone, and place it directly on the glass.
Next is adding the meanings to the sides of the frames. Using the Exacto knife and cutting matte, cut the balsa wood to the same size as the side of the picture frame.
Once you have all your balsa wood cut to size, measure out where you want the letters to start, so that you can keep it consistent with all the frames.
Next, carefully place the letter stickers onto the balsa wood. Make sure that the letters are firmly stuck in place, so that they don’t move around when you start painting.
Using paint sponges, gently dab some white paint across the whole surface of the balsa strips. I found it best to do two or three coats of paint – dabbing it on and then smoothing the final coat on.
Once the paint has dried, carefully remove the letter stickers. I found it easiest to use the edge of my Exacto knife to gently cut and lift the edges of the stickers from the paint. This way the paint didn’t peal off with the stickers.
Last step is to attack the now labeled balsa wood onto the sides of the picture frames.

allison has always been in love with interior design. from an early age she has been fascinated with the impact that design has on our everyday living environment, and has the rare ability to walk into a space and visualize it at its full potential. allison believes that interior design is an art form that takes the ordinary to extraordinary, and strives to achieve practical solutions that are both beautiful and elegant.